Project 1: Filament Dryer Box
- Justin Spaid
- May 21, 2022
- 2 min read

Updated: May 22, 2022
This box is based on a dryer box built by CNC Kitchen (insert link).
Phase 1: Static dryer box - Complete
Water tight box. I purchased the Ezy Storage 75L 79.3 Qt Waterproof Clear Latch Tote for $29.48 at Home Depot
Use holders designed for 25mm PVC pipe, scaled up to 26.8mm (3/4" OD PVC). I got mine from Thingiverse where Stefan from CNC Kitchen uploaded a model.
Also printed three filament dust filters in PETG. Originally printed at .2mm layers, but the hinge seized. Reprinted in .12mm layers. (Waiting on results). The model I used is on Thingiverse by Haprog.
Silicia Gel Beads will be placed at the bottom of the box. Will turn from Blue to Pink to indicate when beads are full and need recharged. I purchased a gallon on Amazon.
Inexpensive Hygrometer will be placed in the box to also monitor internal humidity.
Five rolls of filament loaded on the filament bar; wood PLA, silk PLA, translucent PLA, regular PLA, and a roll of TPU that I cant get to work right. I have tried everything. Lowered my print speed, tried all kinds of temperatures, all kinds of layer heights and widths. They all come out brittle and separating and more crunchy than squishy. I'm hoping the cause is moisture.
I placed about 1.5 lbs of Silicia in a plastic bowl and set it on the bottom of the box. I also placed the hygrometer on the bottom of the box. I then sealed the box and gave it about 15 minutes before taking my first look at the hygrometer which read 38%. After 4 hours, 34%. The rate of decrease seems a little slow to me, but maybe I need to temper my expectations a little bit. Or I may need to increase the amount of desiccant present. Or maybe I need to spread them out.
I came back in the morning to check on it, and it still only reached 33%. I added another plastic bowl of desiccant to the bottom of the box, checked it again 30 minutes later, and the humidity dropped to 31%.
It stalled at 30% later in the day. I took both bowls of Sicicia and spread it on the bottom of the box. An hour later, it is showing 11%.
Phase 2: Bowden Tube Extensions - 0% complete
Two or three tube paths
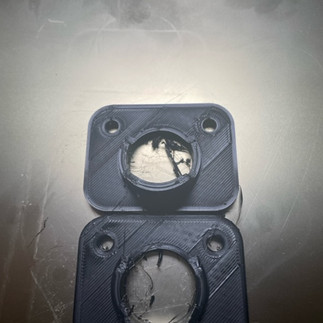
Six Bowden valves; three at the top to connect Bowden tubes to, three at the bottom to insert printer end of the Bowden tube when not in use.
Valve plugs needed for the bottom three valves when not used to prevent moisture from sneaking in.
Bowden tubes will guide filament to each printer's entry point; Ender 3 Pro, into the Micro Swiss Direct Drive; Ender 3 V2, route to the extruder motor tensioner
The point of this phase is to enable active printing directly from the dryer box to reduce the opportunity's for moisture to come in contact with the filament. If properly built, the first time the filament should be exposed to moisture will be right at the extruder gears. Each printer is also set up where the filament clears the gears and goes directly back into the final guide tubes.
Phase 1 Gallery (More to Come):


Phase 2 Gallery (Coming Soon)

Comments